Procedure Setup
Create Procedure Wizard
To create a new procedure, go to: WEAVR > Procedure > Create Procedure.
This wizard allows you to configure:
| Setting | Description |
|---|---|
| Procedure Name | Name of the procedure |
| Filepath | Where to save the procedure (from the Procedures folder, which is automatically created in Assets when configuring the WEAVR project), and the name of the procedure file |
| Select a Template | The Procedure's configuration type |
| Select Execution Modes | Depending on the selected template, different execution modes will be displayed |
| Select Languages | Select the languages you want to make available for your procedure |
Once you choose the procedure settings, press the Create button to create a procedure.
Procedure Editor
After clicking on the Create button, you will be able to see the Procedure Editor screen. This editor lets you create and edit the procedure structure: adding nodes, manage events, variables, and other things.
You can also find it in: WEAVR > Procedures > Procedure Editor.
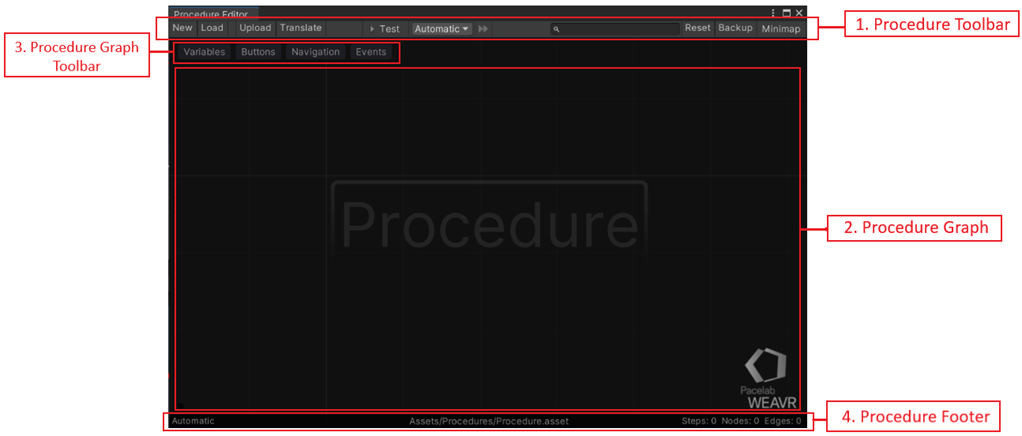
The procedure editor window consists of the following elements:
| Element | Description |
|---|---|
| Procedure Toolbar | Navigation toolbar that contains commands to create, test, and manipulate a procedure |
| Procedure Graph | The main view of the procedure, where you can drag, connect, and edit procedure elements (Nodes, Groups, Transitions, etc.), as well as visually debug the procedure |
| Procedure Graph Toolbar | Useful tools for the management of the procedure |
| Procedure Footer | Contains various information about the current procedure |
Procedure Editor Toolbar
![]()
| Button | Function |
|---|---|
| New | Create a new procedure |
| Load | Load a procedure |
| Build | Build the procedure that will be uploaded to the WEAVR Manager |
| Score | Open Score System window |
| Translate | Translate texts inside a procedure |
| Test | If enabled, the procedure starts playing as soon as you click the Play button |
| Automatic/Guided/Feedback | Execution mode in which the procedure will be tested |
| Fast-Forward | After selecting which node to start the test from (right click on the node and "Test from here"), press the button to fast-forward the previous nodes |
| Search bar | Search by names, GameObject, actions inside a procedure |
| Reset | Reset the procedure and all his nodes and transitions |
| Backup | Backs up the procedure. This file is not accessible for the user |
| Minimap | Toggles the minimap of the procedure |
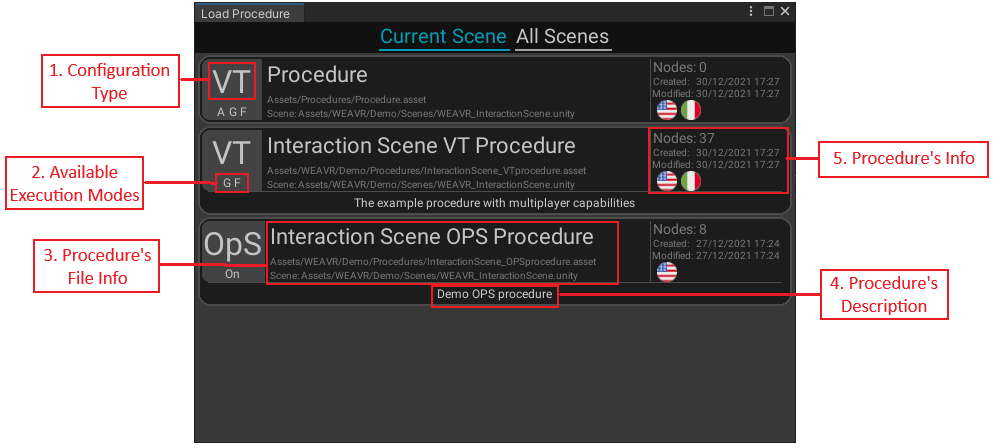
Load Procedure Window
By clicking on the Load button, a new window will appear with the procedures available for both the current scene and all those present in the project.
Procedure File from Inspector
In the Procedure Footer, you can find some useful information:
- The current execution mode
- The location of the procedure
- Total number of steps, nodes, transitions
By clicking on the location of the procedure, a new window shows up:
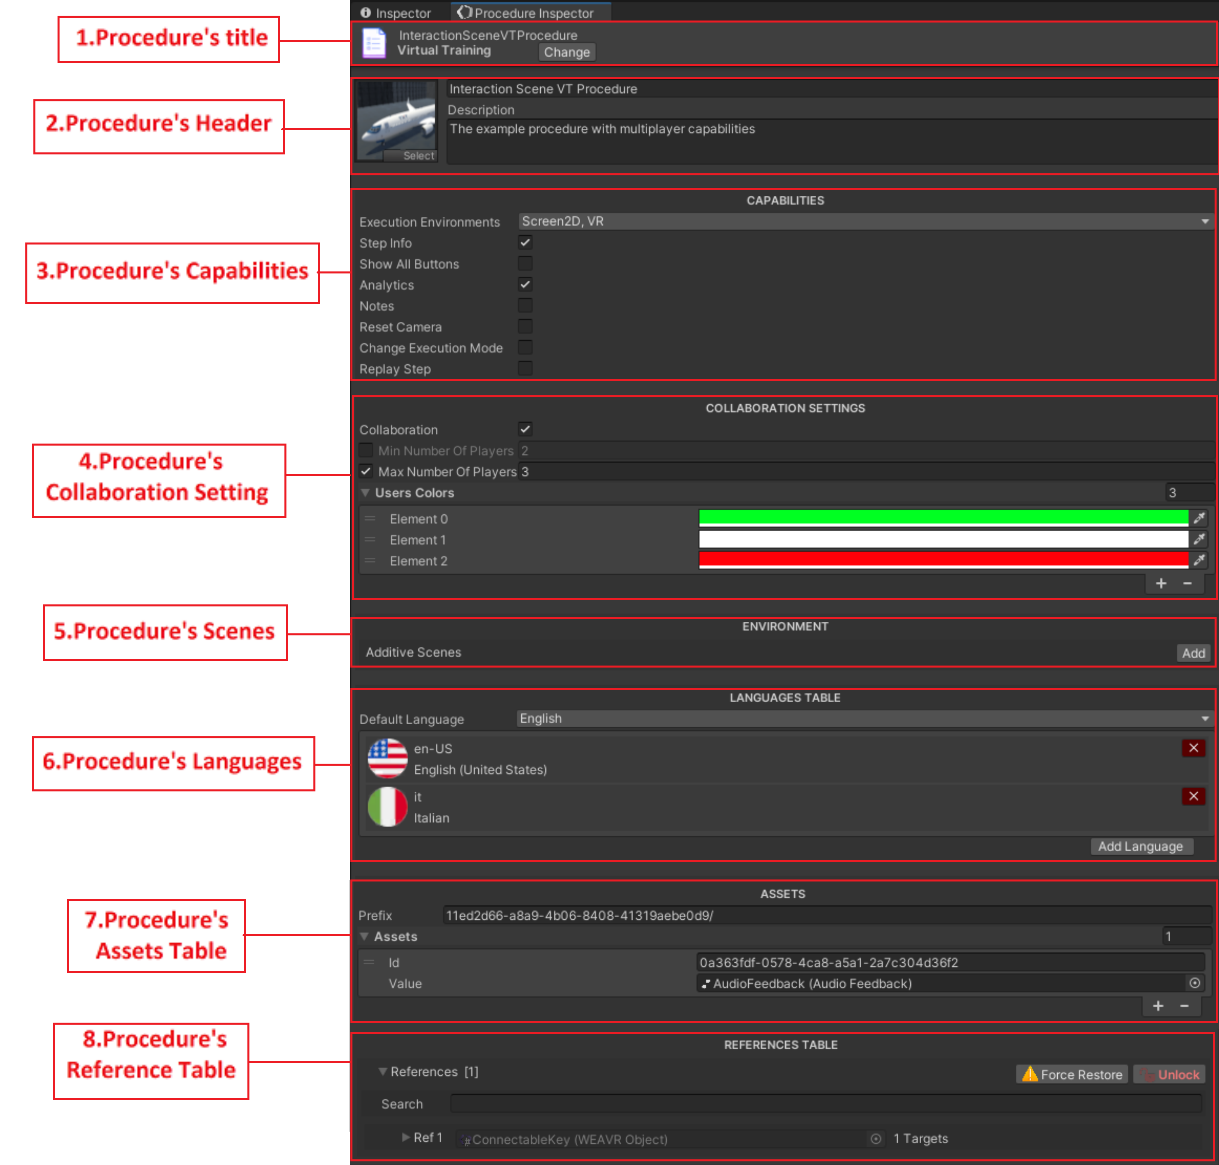
| Field | Description |
|---|---|
| Title | Procedure's name and configuration type. You can convert your procedure to another configuration by clicking the Change button |
| Header | Name, description, and image preview of the current procedure |
| Capabilities | Sets procedure's features such as Analytics, opportunity to take notes, possibility to replay steps, etc. These capabilities depend on the configuration type. With Execution Environments you can choose the target devices for the procedure |
| Collaboration | Whether this procedure can be played in multiplayer or not. You can also define max/min number of players |
| Environment | If the procedure is shared among multiple scenes, the list includes the additive scenes |
| Languages | The available languages for this procedure. Here you can change the default one and add more languages |
| Asset Table | List of all the Assets that are referenced in the procedure. DO NOT MODIFY THIS |
| Reference Table | Lists all GameObjects that are referenced in the procedure. The number and targets are specified for each reference. By clicking on the Lock/Unlock button, you can replace the referenced GameObject for all its procedure targets |
When opening a procedure, if actions or exit conditions have missing references, click the Force Restore button.
Graph Elements Inspector Window
Back to the Procedure Editor Footer, if you click on the total number of steps and nodes, a new window pops up:
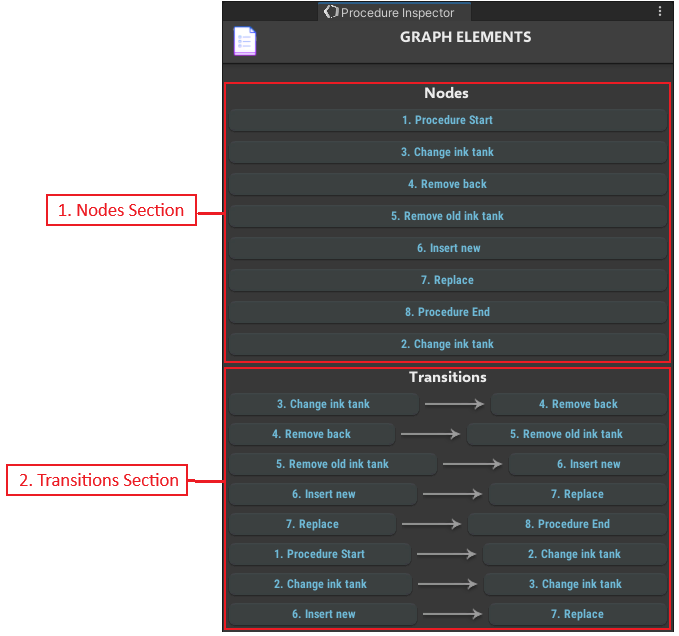
| Section | Description |
|---|---|
| Nodes Section | Contains the list of all the nodes inside the procedure. If you click on a node, this will be highlighted and selected within the graph |
| Transitions Section | Contains the list of all the transitions between nodes inside the procedure |
Procedure Graph Toolbar
![]()
The Procedure Graph Toolbar allows you to control and customize some of the features of your procedure.
Variables Tab
The Variables section allows you to create, check, and remove all the variables that you created inside your procedure.
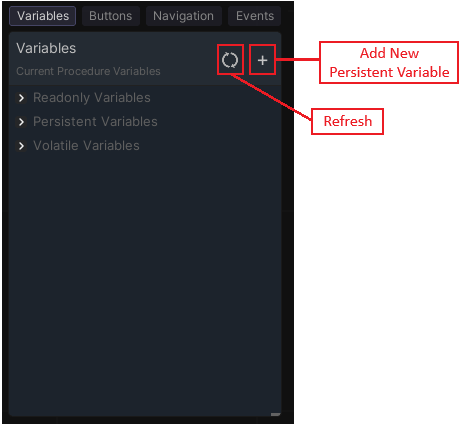

There are 3 types of variables:
| Type | Description |
|---|---|
| Read-only Variables | These variables cannot be modified; they contain information such as the CurrentStep or the GrabbedObject. They can be used within the procedure in the conditions and actions, and furthermore, by dragging them into the graph, a node with the possible exit conditions for this variable will be automatically generated. You can do the same thing by dragging them inside an exit condition of any node |
| Persistent Variables | These variables remain for the entire duration of the procedure, can be added using the appropriate button and can be modified from within the procedure itself. You can set an initial value and you can see how many nodes are using it (References). You can drag and drop them like the Read-Only Variables |
| Volatile Variables | These variables are generated during the procedure and deleted at the end of it. These are all those variables created through actions such as: Set Variable, Set Variable from Object. You can make a volatile variable a persistent one by right-clicking on the variable and selecting Make Persistent |
The variables can be controlled through the WEAVR tool that you can find in WEAVR > Diagnostics > Variables.
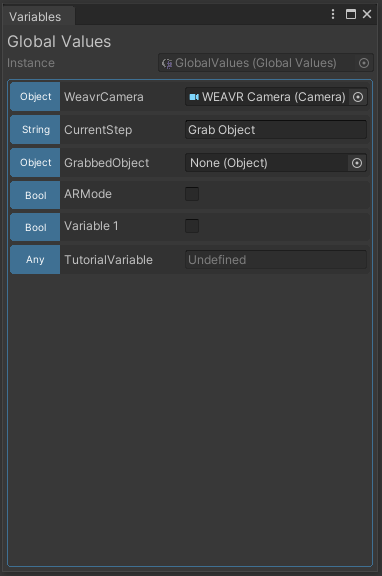
When in Play Mode this tool allows you to see all the variables active during the procedure and see their changes through the steps.
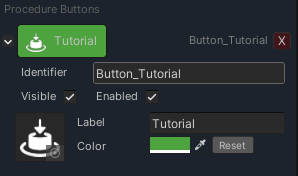
Buttons Tab

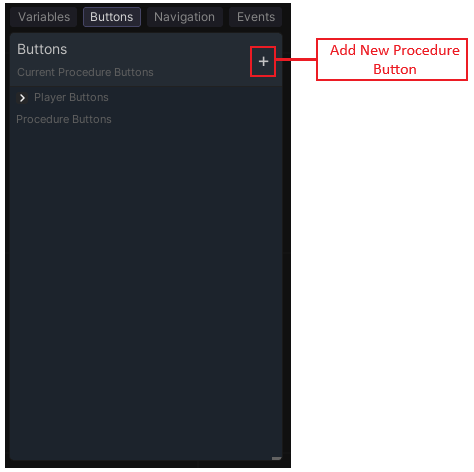
The Buttons tab contains all the buttons and toggles present in the user interface during the OpS procedures. Some of these are present by default such as the next and back buttons.
To create a new one, click on the appropriate button and customize it as you like. You can drag and drop them inside the Procedure graph to generate an Event Node with the proper actions and conditions.
Navigation Tab
The Navigation Tab allows you to modify the steps that will be displayed in the side panel of your OpS procedure.
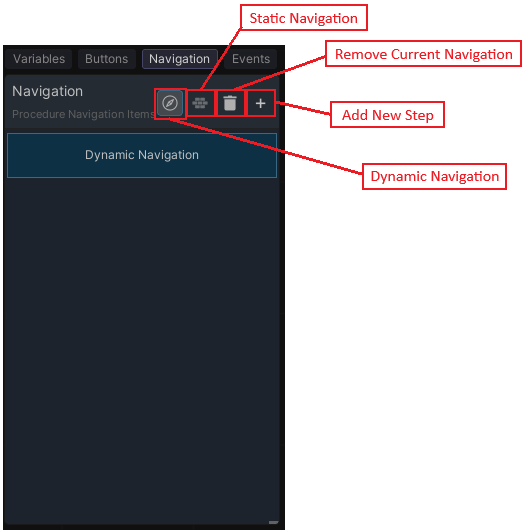
The default mode is the so-called Dynamic: the steps are automatically generated considering the various nodes present within the procedure.
The Static mode, on the other hand, generates all the steps of the procedure only once. In this case it is possible to modify each single step and add others, but if another node is added to the procedure, this will not be automatically inserted as a step of the Navigation.
Events Tab
The Events Tab contains all the procedure events. These events can be recalled via Event Nodes or via actions such as Manage Event and Raise Event.
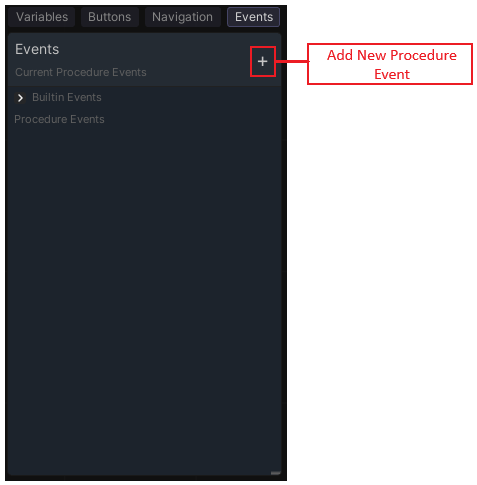
Some events are already defined as Step Started and Step Finished; others can be generated by clicking on the appropriate button.
You can drag and drop any event inside the Procedure graph to generate the related Event Node.
Player Tab
The Player tab lists key components of the WEAVR Player UI. By dragging these items into the procedure editor or within a node you can control the visibility of the components during the procedure.
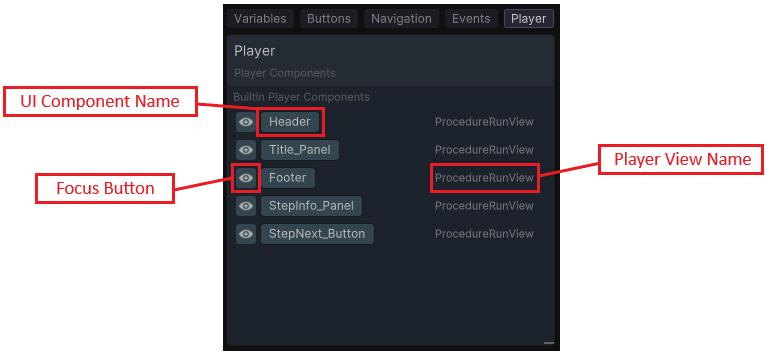
The Player View name indicates which view the UI Component belongs to. By clicking the Focus button you'll see a screenshot of the Player View with the component highlighted.